1.已經蓋好藥品工廠、藥品已取名
2.Phase 2的資料可以找到一些,且可以看到藥品有效
3.在歐洲進行臨床實驗,實驗數據與實驗設計比較可信
待續..
2016年12月5日 星期一
為什麼買中裕4147?
1.宇昌案蔡英文全身而退,說明這公司經營管理正派,一點把柄都沒有
2.有很好的phase 2B臨床實驗數據
3.FDA給孤兒藥、Breakthrough Therapy突破性治療的資格
4.已經有些人陸續使用TMB-355靜脈注射多年,安全性良好
5.技術來源是何大一
6.相關技術資料很好找到,相對上比其他公司透明
7.Phase3完成且通過
8.後續還有肌肉注射、LM52、雙抗體的pipeline,都是基於ibalizumab而來的,成功率應該會較高
待續..
2.有很好的phase 2B臨床實驗數據
3.FDA給孤兒藥、Breakthrough Therapy突破性治療的資格
4.已經有些人陸續使用TMB-355靜脈注射多年,安全性良好
5.技術來源是何大一
6.相關技術資料很好找到,相對上比其他公司透明
7.Phase3完成且通過
8.後續還有肌肉注射、LM52、雙抗體的pipeline,都是基於ibalizumab而來的,成功率應該會較高
待續..
2016年12月4日 星期日
重新安裝 Nexus 7 [2013] Image
重新安裝Nexus 7 [2013] Image
參考
Factory Images for Nexus and Pixel Devices
https://developers.google.com/android/images
步驟
1.所需工具:adb.exe 與fastboot.exe
Android SDK (Android Studio https://developer.android.com/studio/index.html#downloads)
下載後安裝,需手動增加Android SDK Tools (https://developer.android.com/studio/intro/update.html)
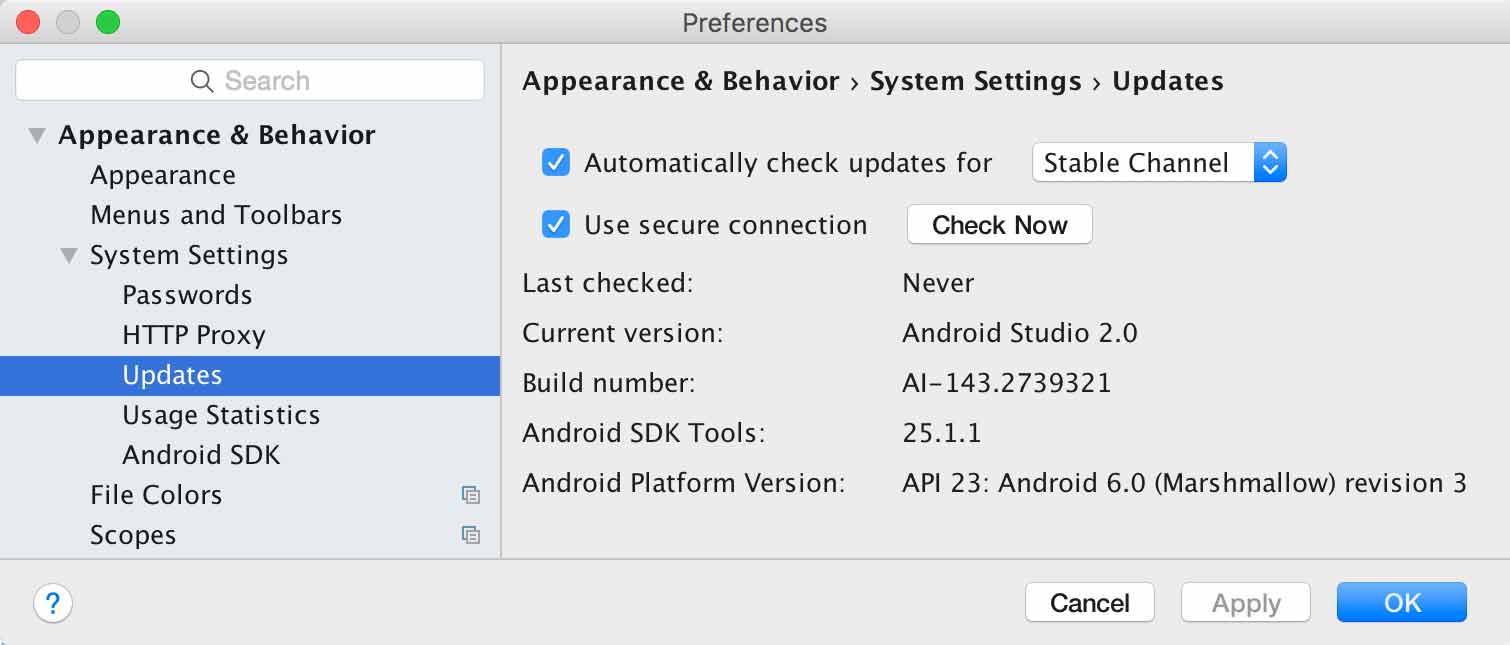
File > Settings > Preferences > Appearance & Behavior > System Settings > Updates
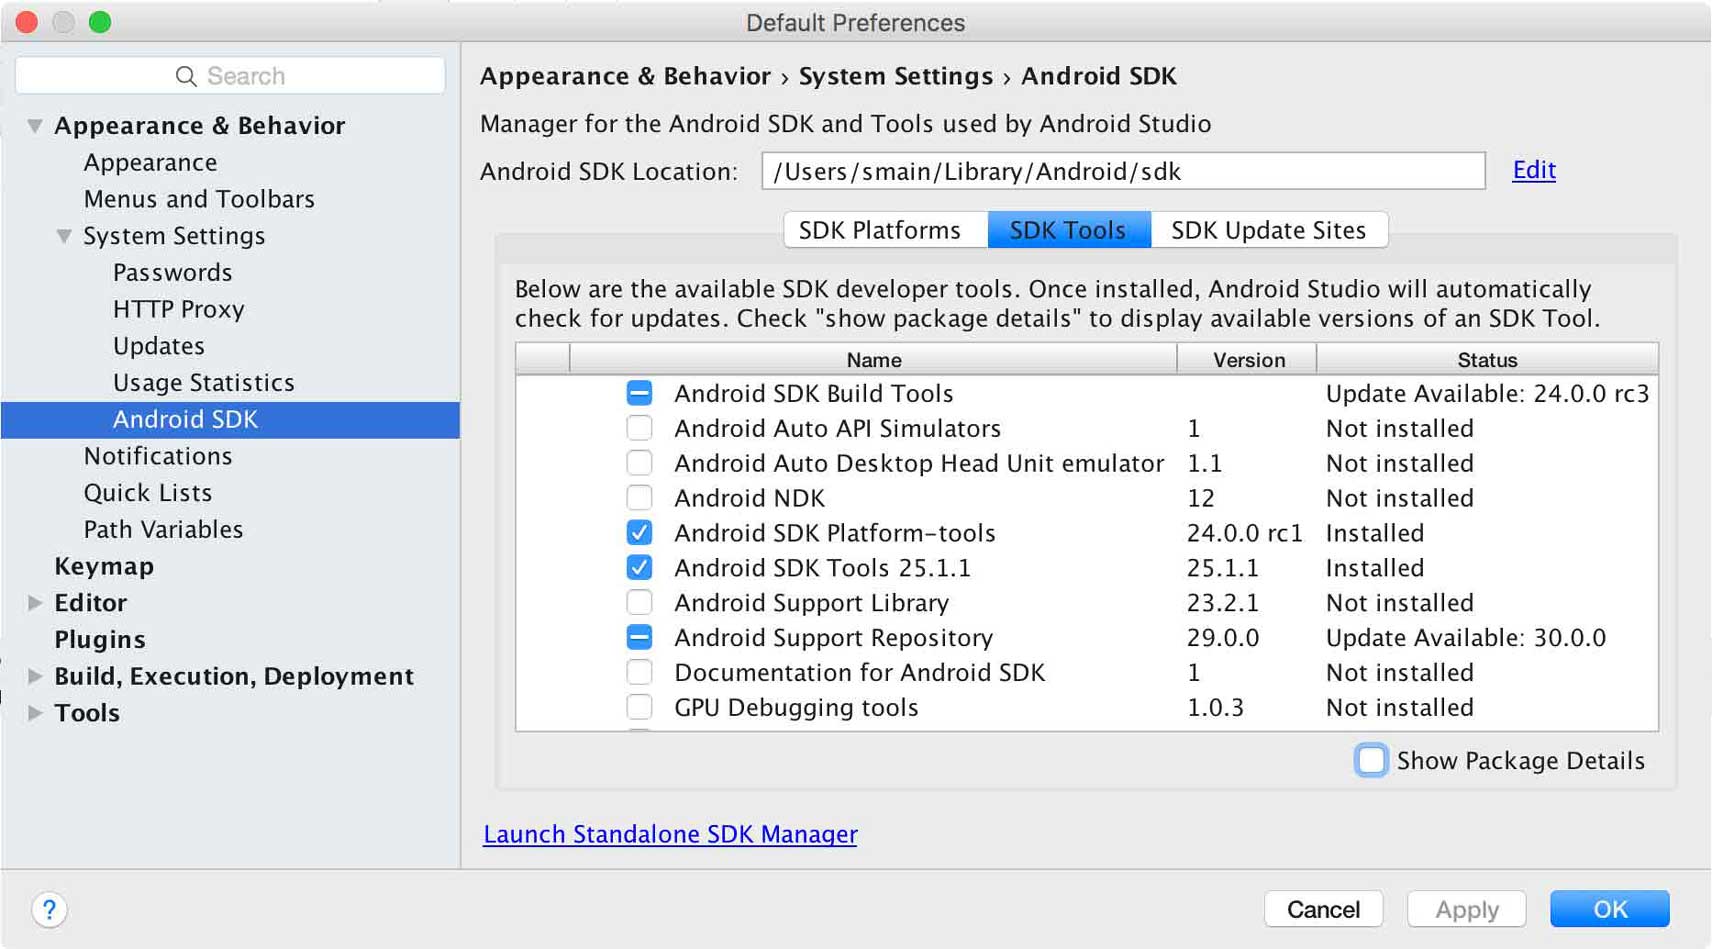
File > Settings > Preferences > Appearance & Behavior > System Settings > Android SDK > SDK Tools Tab
or
Tools > Android > SDK Manager > SDK Tools Tab
增加Android SDK Platform-tools
更新後在Local PC..\Users\User\AppData\Local\Android\sdk\platform-tools
資料夾內可以找到adb.exe 與fastboot.exe
2.下載原廠ROM
"razor" for Nexus 7 [2013] (Wi-Fi) 6.0.1 (MOB30X)
3.重新安裝 Nexus 7 [2013] Image的步驟
3.1.Nexus7開啟USB Debug Mode (關於平板電腦 > 版本號碼連續按7下可以開啟開發人員選項)
3.2.連接上Local PC,會自動抓driver,Nexus 7 上跳出message box,詢問是否授權USB debug mode,建立USB debug mode連線。
3.3.在Local PC上開啟cmd.exe,執行adb.exe
3.4.指令
$adb devices (查看手機裝置是否有順利連接)
$adb kill-server (關掉 adb 伺服器)
-->如果有多餘的虛擬連線,要先砍掉,不然會跳出error message
$adb reboot bootloader (Nexus 7重新開機後進入fastboot mode)
3.5.fastboot mode的操作
unlock/lock:$fastboot oem unlock/lock (Nexus 7 [2013]是舊型號)
3.6.在原廠ROM裡面已經有flash-all script,執行即開始更新Image
3.7."flash-all.bat" for windows
@ECHO OFF
:: Copyright 2012 The Android Open Source Project
::
:: Licensed under the Apache License, Version 2.0 (the "License");
:: you may not use this file except in compliance with the License.
:: You may obtain a copy of the License at
::
:: http://www.apache.org/licenses/LICENSE-2.0
::
:: Unless required by applicable law or agreed to in writing, software
:: distributed under the License is distributed on an "AS IS" BASIS,
:: WITHOUT WARRANTIES OR CONDITIONS OF ANY KIND, either express or implied.
:: See the License for the specific language governing permissions and
:: limitations under the License.
PATH=%PATH%;"%SYSTEMROOT%\System32"
:: 所以在PATH內要加上flash-all.bat的路徑
::參考:環境變數 (Environment Variable) https://shaochien.gitbooks.io/command-line-and-environment-variable-tutorial/content/environment-variable.html

fastboot flash bootloader bootloader-flo-flo-04.08.img
fastboot reboot-bootloader
ping -n 5 127.0.0.1 >nul
fastboot -w update image-razor-mob30x.zip
echo Press any key to exit...
pause >nul
exit
參考
Factory Images for Nexus and Pixel Devices
https://developers.google.com/android/images
步驟
1.所需工具:adb.exe 與fastboot.exe
Android SDK (Android Studio https://developer.android.com/studio/index.html#downloads)
下載後安裝,需手動增加Android SDK Tools (https://developer.android.com/studio/intro/update.html)
File > Settings > Preferences > Appearance & Behavior > System Settings > Updates
File > Settings > Preferences > Appearance & Behavior > System Settings > Android SDK > SDK Tools Tab
or
Tools > Android > SDK Manager > SDK Tools Tab
增加Android SDK Platform-tools
更新後在Local PC..\Users\User\AppData\Local\Android\sdk\platform-tools
資料夾內可以找到adb.exe 與fastboot.exe
2.下載原廠ROM
"razor" for Nexus 7 [2013] (Wi-Fi) 6.0.1 (MOB30X)
3.重新安裝 Nexus 7 [2013] Image的步驟
3.1.Nexus7開啟USB Debug Mode (關於平板電腦 > 版本號碼連續按7下可以開啟開發人員選項)
3.2.連接上Local PC,會自動抓driver,Nexus 7 上跳出message box,詢問是否授權USB debug mode,建立USB debug mode連線。
3.3.在Local PC上開啟cmd.exe,執行adb.exe
3.4.指令
$adb devices (查看手機裝置是否有順利連接)
$adb kill-server (關掉 adb 伺服器)
-->如果有多餘的虛擬連線,要先砍掉,不然會跳出error message
$adb reboot bootloader (Nexus 7重新開機後進入fastboot mode)
3.5.fastboot mode的操作
unlock/lock:$fastboot oem unlock/lock (Nexus 7 [2013]是舊型號)
3.6.在原廠ROM裡面已經有flash-all script,執行即開始更新Image
3.7."flash-all.bat" for windows
@ECHO OFF
:: Copyright 2012 The Android Open Source Project
::
:: Licensed under the Apache License, Version 2.0 (the "License");
:: you may not use this file except in compliance with the License.
:: You may obtain a copy of the License at
::
:: http://www.apache.org/licenses/LICENSE-2.0
::
:: Unless required by applicable law or agreed to in writing, software
:: distributed under the License is distributed on an "AS IS" BASIS,
:: WITHOUT WARRANTIES OR CONDITIONS OF ANY KIND, either express or implied.
:: See the License for the specific language governing permissions and
:: limitations under the License.
PATH=%PATH%;"%SYSTEMROOT%\System32"
:: 所以在PATH內要加上flash-all.bat的路徑
::參考:環境變數 (Environment Variable) https://shaochien.gitbooks.io/command-line-and-environment-variable-tutorial/content/environment-variable.html

fastboot flash bootloader bootloader-flo-flo-04.08.img
fastboot reboot-bootloader
ping -n 5 127.0.0.1 >nul
fastboot -w update image-razor-mob30x.zip
echo Press any key to exit...
pause >nul
exit
訂閱:
意見 (Atom)